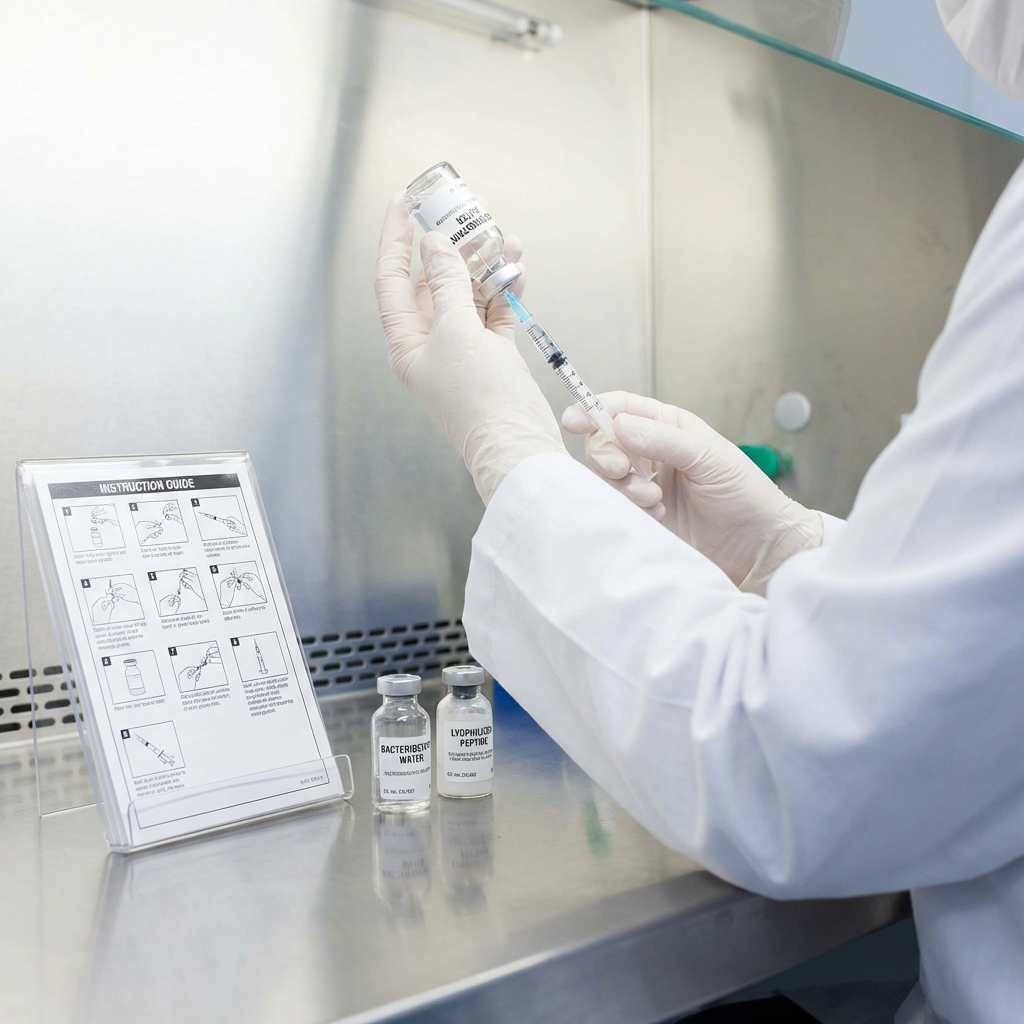
How to Reconstitute Lyophilized Peptides: Step-by-Step Guide
Comprehensive guide on how to properly reconstitute lyophilized peptides for research, covering solvent selection, mixing, and storage.
Table of Contents
Peptide Reconstitution Steps
- Remove vial from - 20°C storage and equilibrate to room temperature for 15 - 30 minutes
- Calculate required solvent volume based on desired final concentration
- Select appropriate solvent based on peptide charge and hydrophobicity
- Add solvent slowly down the side of the vial to avoid direct contact with peptide cake
- Gently swirl or rock the vial for 5 - 10 minutes until fully dissolved
- Apply brief sonication if needed for complete dissolution
- Verify pH and filter through 0.22 μm sterile filter if required
- Aliquot immediately into single - use volumes in low - binding tubes
- Snap freeze aliquots and store at - 80°C to prevent degradation
Choosing the Right Reconstitution Solvent
For Basic Peptides(Net Positive Charge)
Start with sterile water or dilute acetic acid(0.1 % v / v, pH ~3).The acidic environment maintains peptide solubility by keeping basic residues protonated. Bacteriostatic water can be used for short - term storage at 4°C when multiple withdrawals from the same vial are needed.The benzyl alcohol preservative prevents bacterial growth but should be avoided for cell culture applications.
For Acidic Peptides(Net Negative Charge)
Use sterile water or dilute ammonium hydroxide(0.1 % v / v, pH ~8).Alkaline conditions keep acidic residues ionized and soluble.
For Hydrophobic Peptides
Initial dissolution in DMSO(10 - 20 % v / v) followed by dilution with aqueous buffer often provides best results.Studies on reconstitution solvent optimization show that 50: 50 acetonitrile:water ratios maximize recovery for certain peptide classes.
For Amphipathic Peptides
PBS or HEPES buffer(pH 7.4) typically works well.These peptides often form micelles at high concentrations. Never use 100 % organic solvent or 100 % water initially if the peptide has solubility challenges.A balanced approach prevents both aggregation and adsorption.
Step - by - Step Reconstitution Protocol
Step 1: Pre - Reconstitution Preparation
Remove the lyophilized peptide vial from - 20°C storage.Allow the sealed vial to equilibrate to room temperature for 15 - 30 minutes. This equilibration step prevents moisture condensation on the cold powder when the vial is opened.Even small amounts of condensation can create localized high - concentration zones that trigger aggregation.
Step 2: Calculate Solvent Volume
Determine the final concentration needed for your research application.Use the peptide mass listed on the Certificate of Analysis to calculate required solvent volume. For a 5 mg peptide requiring a 1 mg / mL stock solution, add 5 mL of appropriate solvent. Account for pipetting errors by preparing slightly more volume than needed.
Step 3: Add Solvent to Peptide
Add solvent slowly down the side of the vial rather than directly onto the peptide cake.This technique prevents localized high concentrations that can cause aggregation. For peptides prone to aggregation, add solvent in small increments.Allow each addition to partially dissolve before adding more.
Step 4: Initial Mixing
Gently swirl or rock the vial to encourage dissolution.Avoid vigorous vortexing, which can denature peptides or introduce air bubbles. Laboratory protocols for peptide disaggregation recommend gentle agitation for 5 - 10 minutes at room temperature.Some peptides may require longer dissolution times.
Step 5: Sonication(If Needed)
If the peptide doesn’t fully dissolve after 10 minutes of gentle mixing, brief sonication may help.Place the sealed vial in a sonicator bath for 1 - 2 minutes. Research on peptide preparation methods shows that sonication at room temperature can improve dissolution without causing degradation for most peptides. Monitor the solution visually.Complete dissolution appears as a clear solution without visible particles or cloudiness.
Step 6: pH Verification
For pH - sensitive applications, verify the final solution pH using pH paper or a calibrated pH meter.Adjust if necessary using dilute acid or base. Remember that some buffers change pH upon dilution or freeze-thaw cycles.Studies on peptide stability show that pH shifts during lyophilization can affect degradation rates in reconstituted solutions.
Step 7: Sterile Filtration
For cell culture applications, filter the reconstituted peptide through a 0.22 μm sterile filter.Use low - binding filters to minimize peptide loss. Filtration removes any particulates or aggregates formed during reconstitution.This step is particularly important for peptides used in in vitro cell assays.
Step 8: Aliquoting
Immediately aliquot the reconstituted peptide into single - use volumes.Freeze - thaw cycles degrade peptides and should be minimized. Use low - binding microcentrifuge tubes for aliquots.Label each tube clearly with peptide name, concentration, reconstitution date, and any relevant batch information.
Step 9: Snap Freezing
Snap freeze aliquots in liquid nitrogen or dry ice / ethanol bath before transferring to - 80°C storage.Rapid freezing prevents ice crystal formation that can damage peptide structure. Research on peptide storage stability demonstrates that snap - frozen aliquots maintain better long - term stability than slow - frozen samples.
Preventing Aggregation and Degradation
Peptide aggregation represents one of the most common reconstitution failures.Aggregates form when peptides interact through hydrophobic surfaces, β - sheet formation, or disulfide bond scrambling.
- Temperature Control: Maintain solutions at 4°C or on ice during handling when possible.Studies on peptide aggregation kinetics show that lower temperatures slow aggregation rates by reducing molecular mobility.
- Concentration Management: High concentrations increase aggregation probability.Prepare concentrated stocks only when necessary and dilute peptide solutions to working concentrations promptly.
- Surface Interactions: Use siliconized or low - binding plasticware.Standard polypropylene tubes can adsorb significant amounts of peptide, particularly at concentrations below 1 mg / mL.
- Oxygen Exposure: Peptides containing methionine, cysteine, or tryptophan are susceptible to oxidation.Research on oxidative peptide damage recommends working under argon or nitrogen atmosphere for sensitive sequences.
- Disaggregation Protocols: For peptides with severe aggregation tendency, specialized disaggregation protocols using TFA/HFIP treatment may be necessary before final reconstitution in aqueous buffers.
Storage Guidelines for Reconstituted Peptides
Reconstituted peptides have limited stability compared to lyophilized powder.Storage conditions directly impact experimental reproducibility. Short - Term Storage(1 - 7 days): Store reconstituted peptides at 4°C in tightly sealed containers.This temperature range slows chemical degradation while preventing freezing. Stability studies in aqueous solution show that many peptides remain stable for several days at 4°C, though specific degradation rates vary by sequence. Long - Term Storage(> 7 days): Store aliquots at - 80°C for extended periods.Avoid - 20°C storage for reconstituted peptides, as this temperature promotes slow degradation. Freeze - Thaw Considerations: Each freeze - thaw cycle causes cumulative damage.Research on freeze - thaw stability demonstrates progressive loss of biological activity with repeated cycles. Plan experiments to minimize the number of freeze - thaw events.Use small aliquots that can be fully consumed in a single experiment. Storage Container Selection: Glass vials or low - binding plastic tubes prevent peptide adsorption.Studies on peptide - surface interactions show that container material significantly affects recovery rates. Environmental Protection: Protect stored peptides from light exposure, particularly for peptides containing tryptophan or tyrosine residues.UV light catalyzes oxidation reactions.
Common Mistakes to Avoid
Following best practices during reconstitution prevents costly experimental failures.These common errors compromise peptide integrity and experimental reproducibility.
- Adding Peptide to Solvent: Always add solvent to peptide, never the reverse.Adding peptide to solvent can create localized supersaturation and immediate aggregation.
- Vigorous Vortexing: Intense mechanical agitation introduces air - liquid interfaces that denature peptides.The resulting foam contains denatured peptide aggregates.
- Room Temperature Storage: Reconstituted peptides left at room temperature degrade rapidly.Even a few hours at ambient temperature can significantly reduce peptide integrity.
- Opening Cold Vials: Opening vials directly from - 20°C storage causes moisture condensation.The water droplets create areas of extreme dilution or concentration that promote degradation.
- Ignoring pH Effects: Peptides can degrade rapidly at extreme pH values.Research on pH - dependent stability shows that different degradation mechanisms dominate at different pH ranges.
- Using Non - Sterile Technique: Bacterial contamination introduces proteases that rapidly degrade peptides.Always use sterile solvents and aseptic technique.
- Incomplete Dissolution: Particulates indicate undissolved or aggregated peptide.Using incompletely dissolved preparations leads to inaccurate concentration estimates and poor experimental reproducibility.
Quality Control Considerations
Verifying successful reconstitution ensures experimental reliability.Several analytical approaches assess peptide quality post - reconstitution.
- Visual Inspection: Properly reconstituted peptides appear as clear, particle - free solutions.Cloudiness, precipitates, or visible particles indicate aggregation or incomplete dissolution.
- Concentration Verification: Measure actual peptide concentration using UV spectroscopy at 280 nm for peptides containing aromatic residues.Compare measured concentration to theoretical values.
- Amino acid analysis provides the most accurate concentration determination for peptides without chromophores.Significant deviations suggest incomplete dissolution, aggregation, or adsorption losses.Low recovery rates may require protocol optimization.
- Analytical Characterization: For critical applications, verify peptide identity and purity using HPLC or mass spectrometry.Studies on peptide characterization recommend periodic quality checks for peptide stocks.
- Biological Activity Testing: For functional peptides, verify biological activity using appropriate cell-based or biochemical assays.Loss of activity indicates structural damage during reconstitution or storage.
- Documentation: Record all reconstitution details including solvent type, final concentration, pH, appearance, and any deviations from standard protocol.This documentation aids troubleshooting when results vary.
Bottom Line
Successful peptide reconstitution requires attention to detail at every step.Proper solvent selection, gentle handling techniques, and appropriate storage conditions preserve peptide integrity for reliable research outcomes. The protocols outlined here provide a foundation for reconstituting most lyophilized research peptides.Individual peptides may require protocol optimization based on their unique physicochemical properties.